Getting Started
Let’s get up and running with Hetty! If you get stuck, start a discussion or ask for help on the Discord server.
Install
The quickest way to install and update Hetty is via a package manager:
- macOS
- Linux
- Windows
brew install hettysoft/tap/hetty
sudo snap install hetty
scoop bucket add hettysoft https://github.com/hettysoft/scoop-bucket.git
scoop install hettysoft/hetty
Alternatively, you can download the latest release from
GitHub for your OS and
architecture, and move the binary to a directory in your $PATH. If your OS is
not available for one of the package managers or not listed in the GitHub
releases, you can compile from source (link?) or use a Docker image (link?).
Run
Once installed, start Hetty from the command line:
hetty
When invoked without any options, this:
- Creates a root CA certificate and private key, stored on disk at
~/.hetty/ - Creates a BadgerDB database, stored on disk at
~/.hetty/db/ - Runs an HTTP server that listens on
0.0.0.0:8080, used for proxying and serving the admin interface
You should see the following console output:
2022/03/01 11:09:15 INFO [main] Hetty (v0.5.1) is running on :8080 ...
2022/03/01 11:09:15 INFO [main] Get started at http://localhost:8080
👉 You can now visit http://localhost:8080 to access the admin interface.
tip
To easily use the HTTP proxy without manual setup, Hetty can invoke Chrome (if installed) on startup with the correct predefined settings, via:
hetty --chrome
Alternatively, you can trust the root CA certificate system wide.
Create a project
- Visit the the admin interface at http://localhost:8080 and click “Manage Projects”.
- Use the “New project” form to create an open a new project:

Once you have a project created and opened, any incoming HTTP requests proxied by Hetty will be logged.
Use the proxy
To use Hetty’s HTTP proxy, you have several options:
- Run Hetty with
hetty --chromeand use a preconfigured Chrome instance (recommended) - Use a browser extension like FoxyProxy (Firefox) or Proxy SwitchyOmega (Chrome)
- Configure system wide HTTP proxy settings (not recommended)
When using a browser extension for proxying, you can use http://localhost:8080
as the proxy URL (unless you’ve specified a custom listen address with the
--addr option).
note
If you’re planning to use the proxy from a machine different than the one running Hetty (e.g. another device in your LAN), you’ll need to use a non-loopback network address, e.g. the IP address assigned by your DHCP server.
👉 With one of the above options, use the proxy by visiting a website to incur some logs we’ll use in the next section.
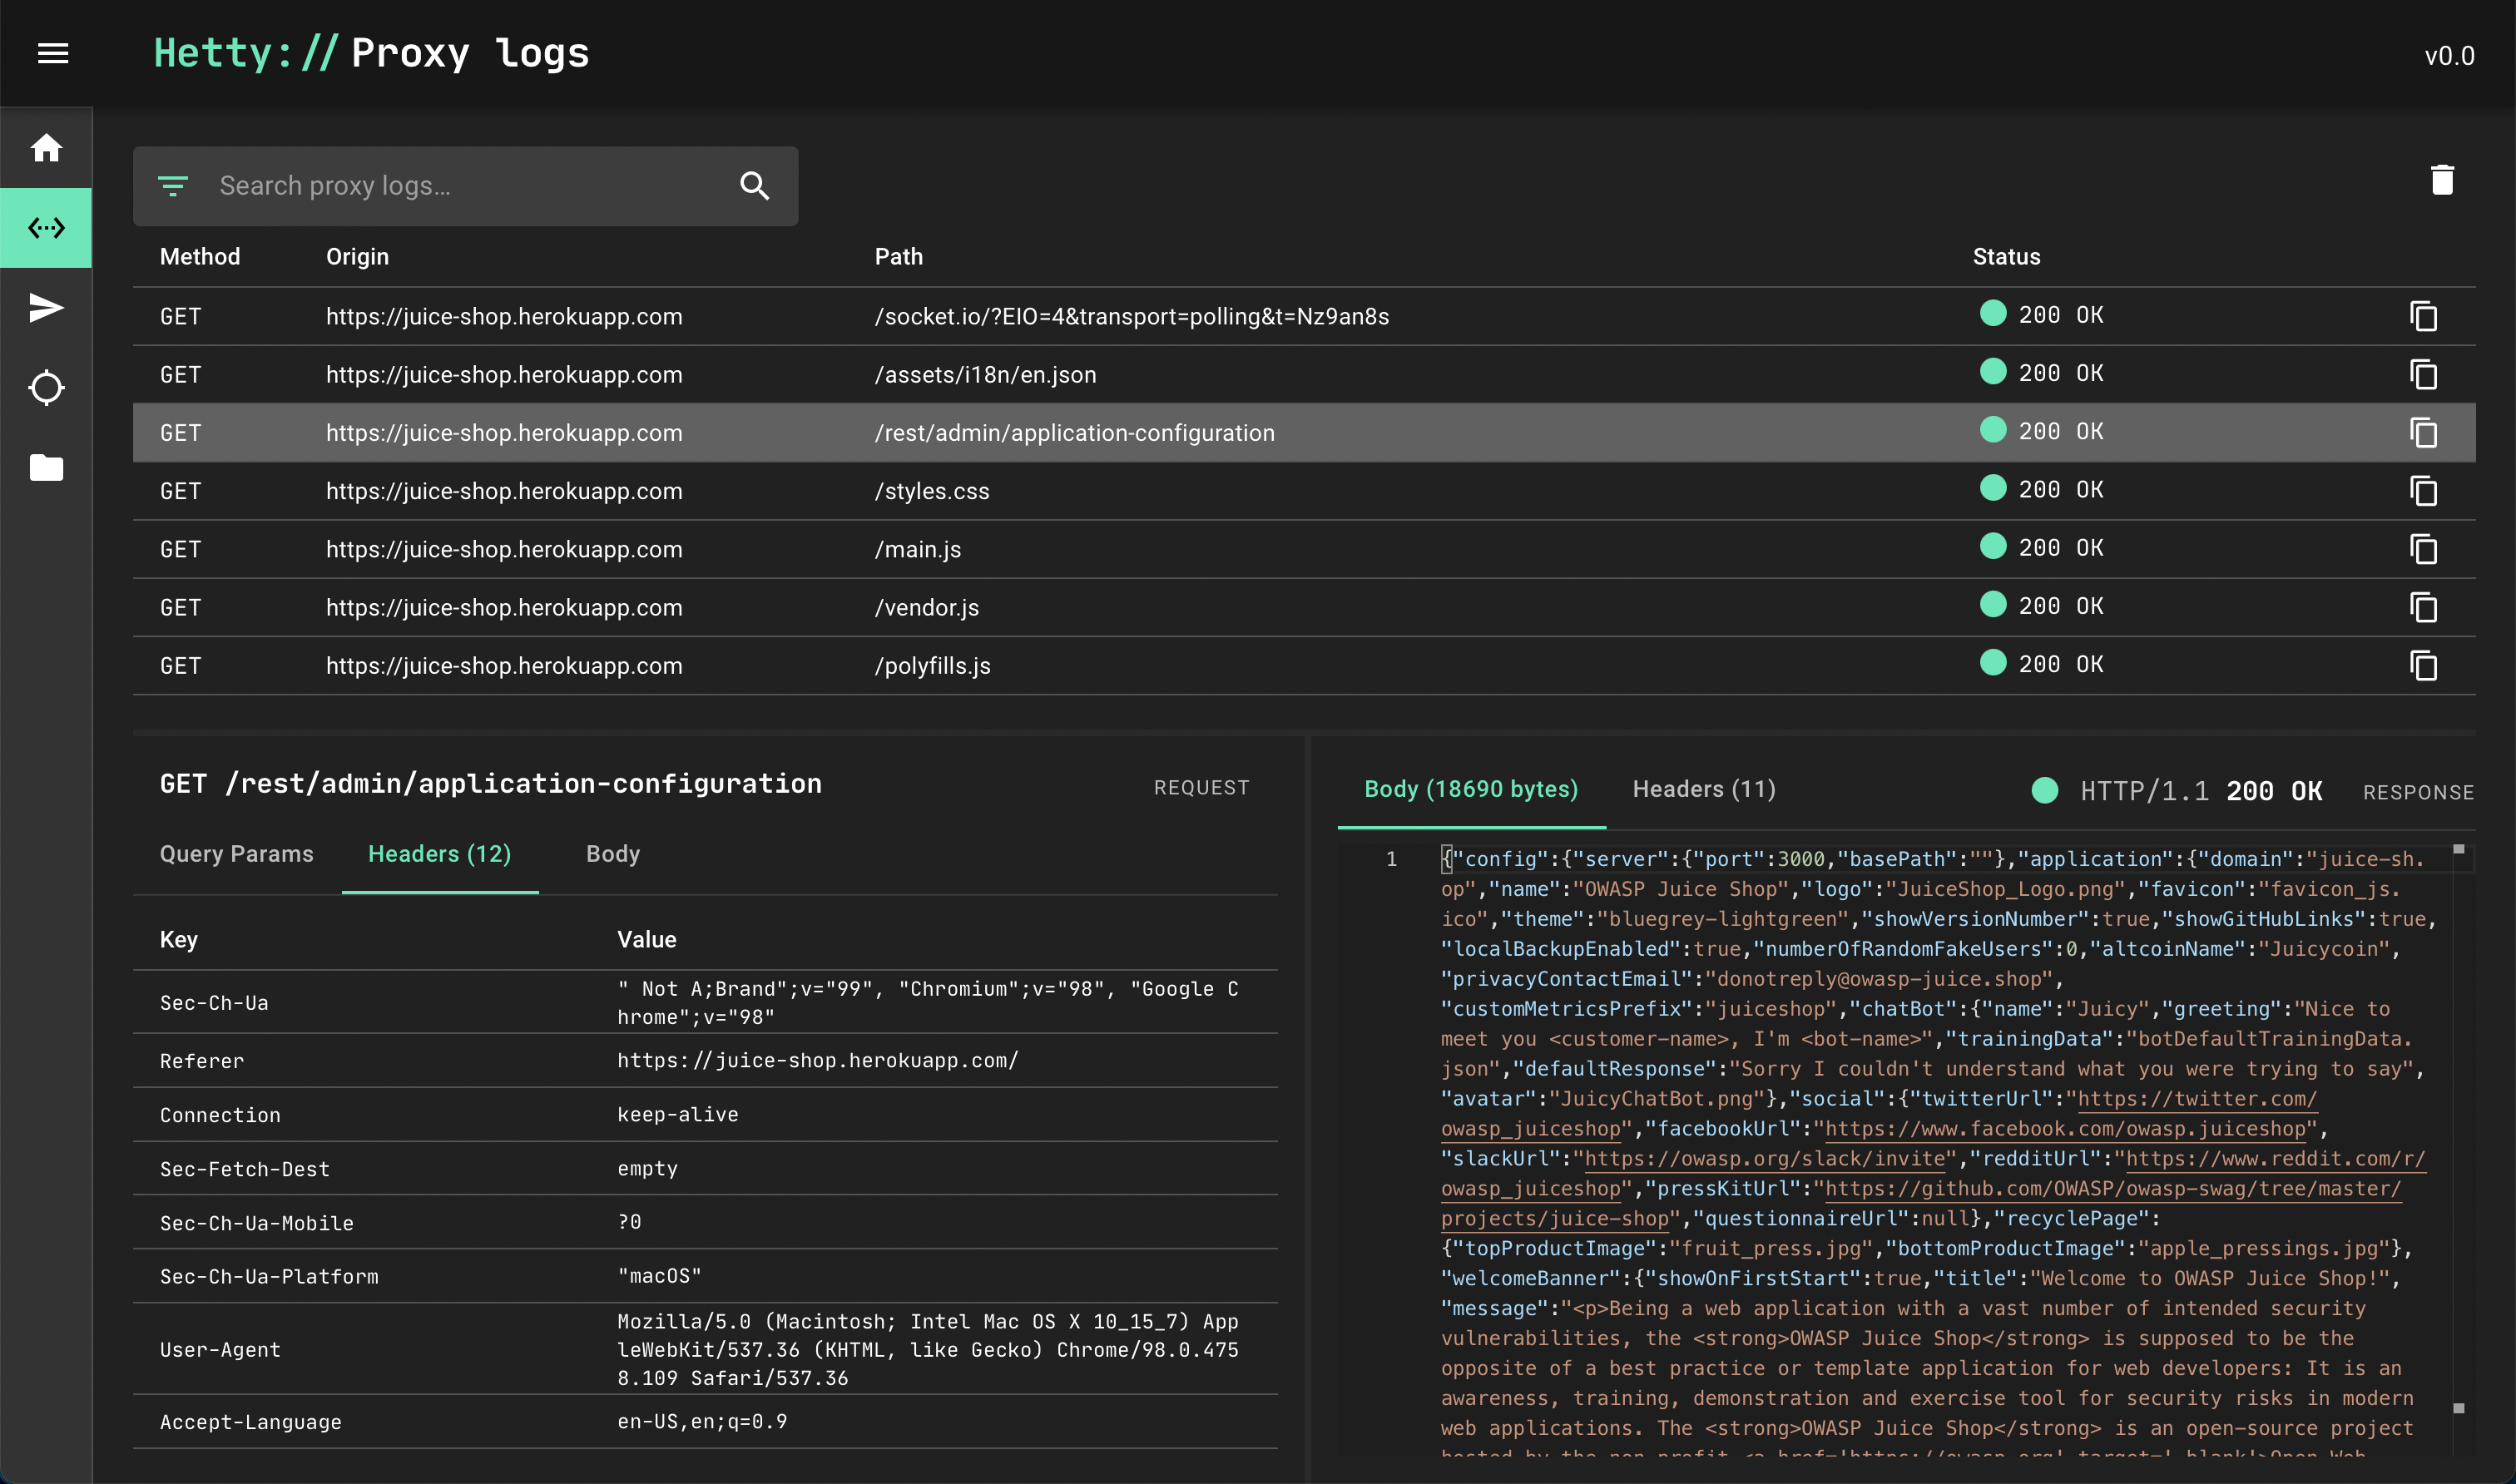
View proxy logs
Once you’ve generated some traffic on the HTTP proxy, there should be some requests logged. Let’s review them by opening the Proxy logs page in the admin interface, found in the vertical menu bar on the left.
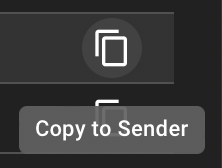
Copy to Sender
Use the “copy” icon next to any log entry to copy this request to the Sender module, allowing you to edit and resend the HTTP request:
Edit & send request
Browse to the Sender module via the vertical menu bar on the left.
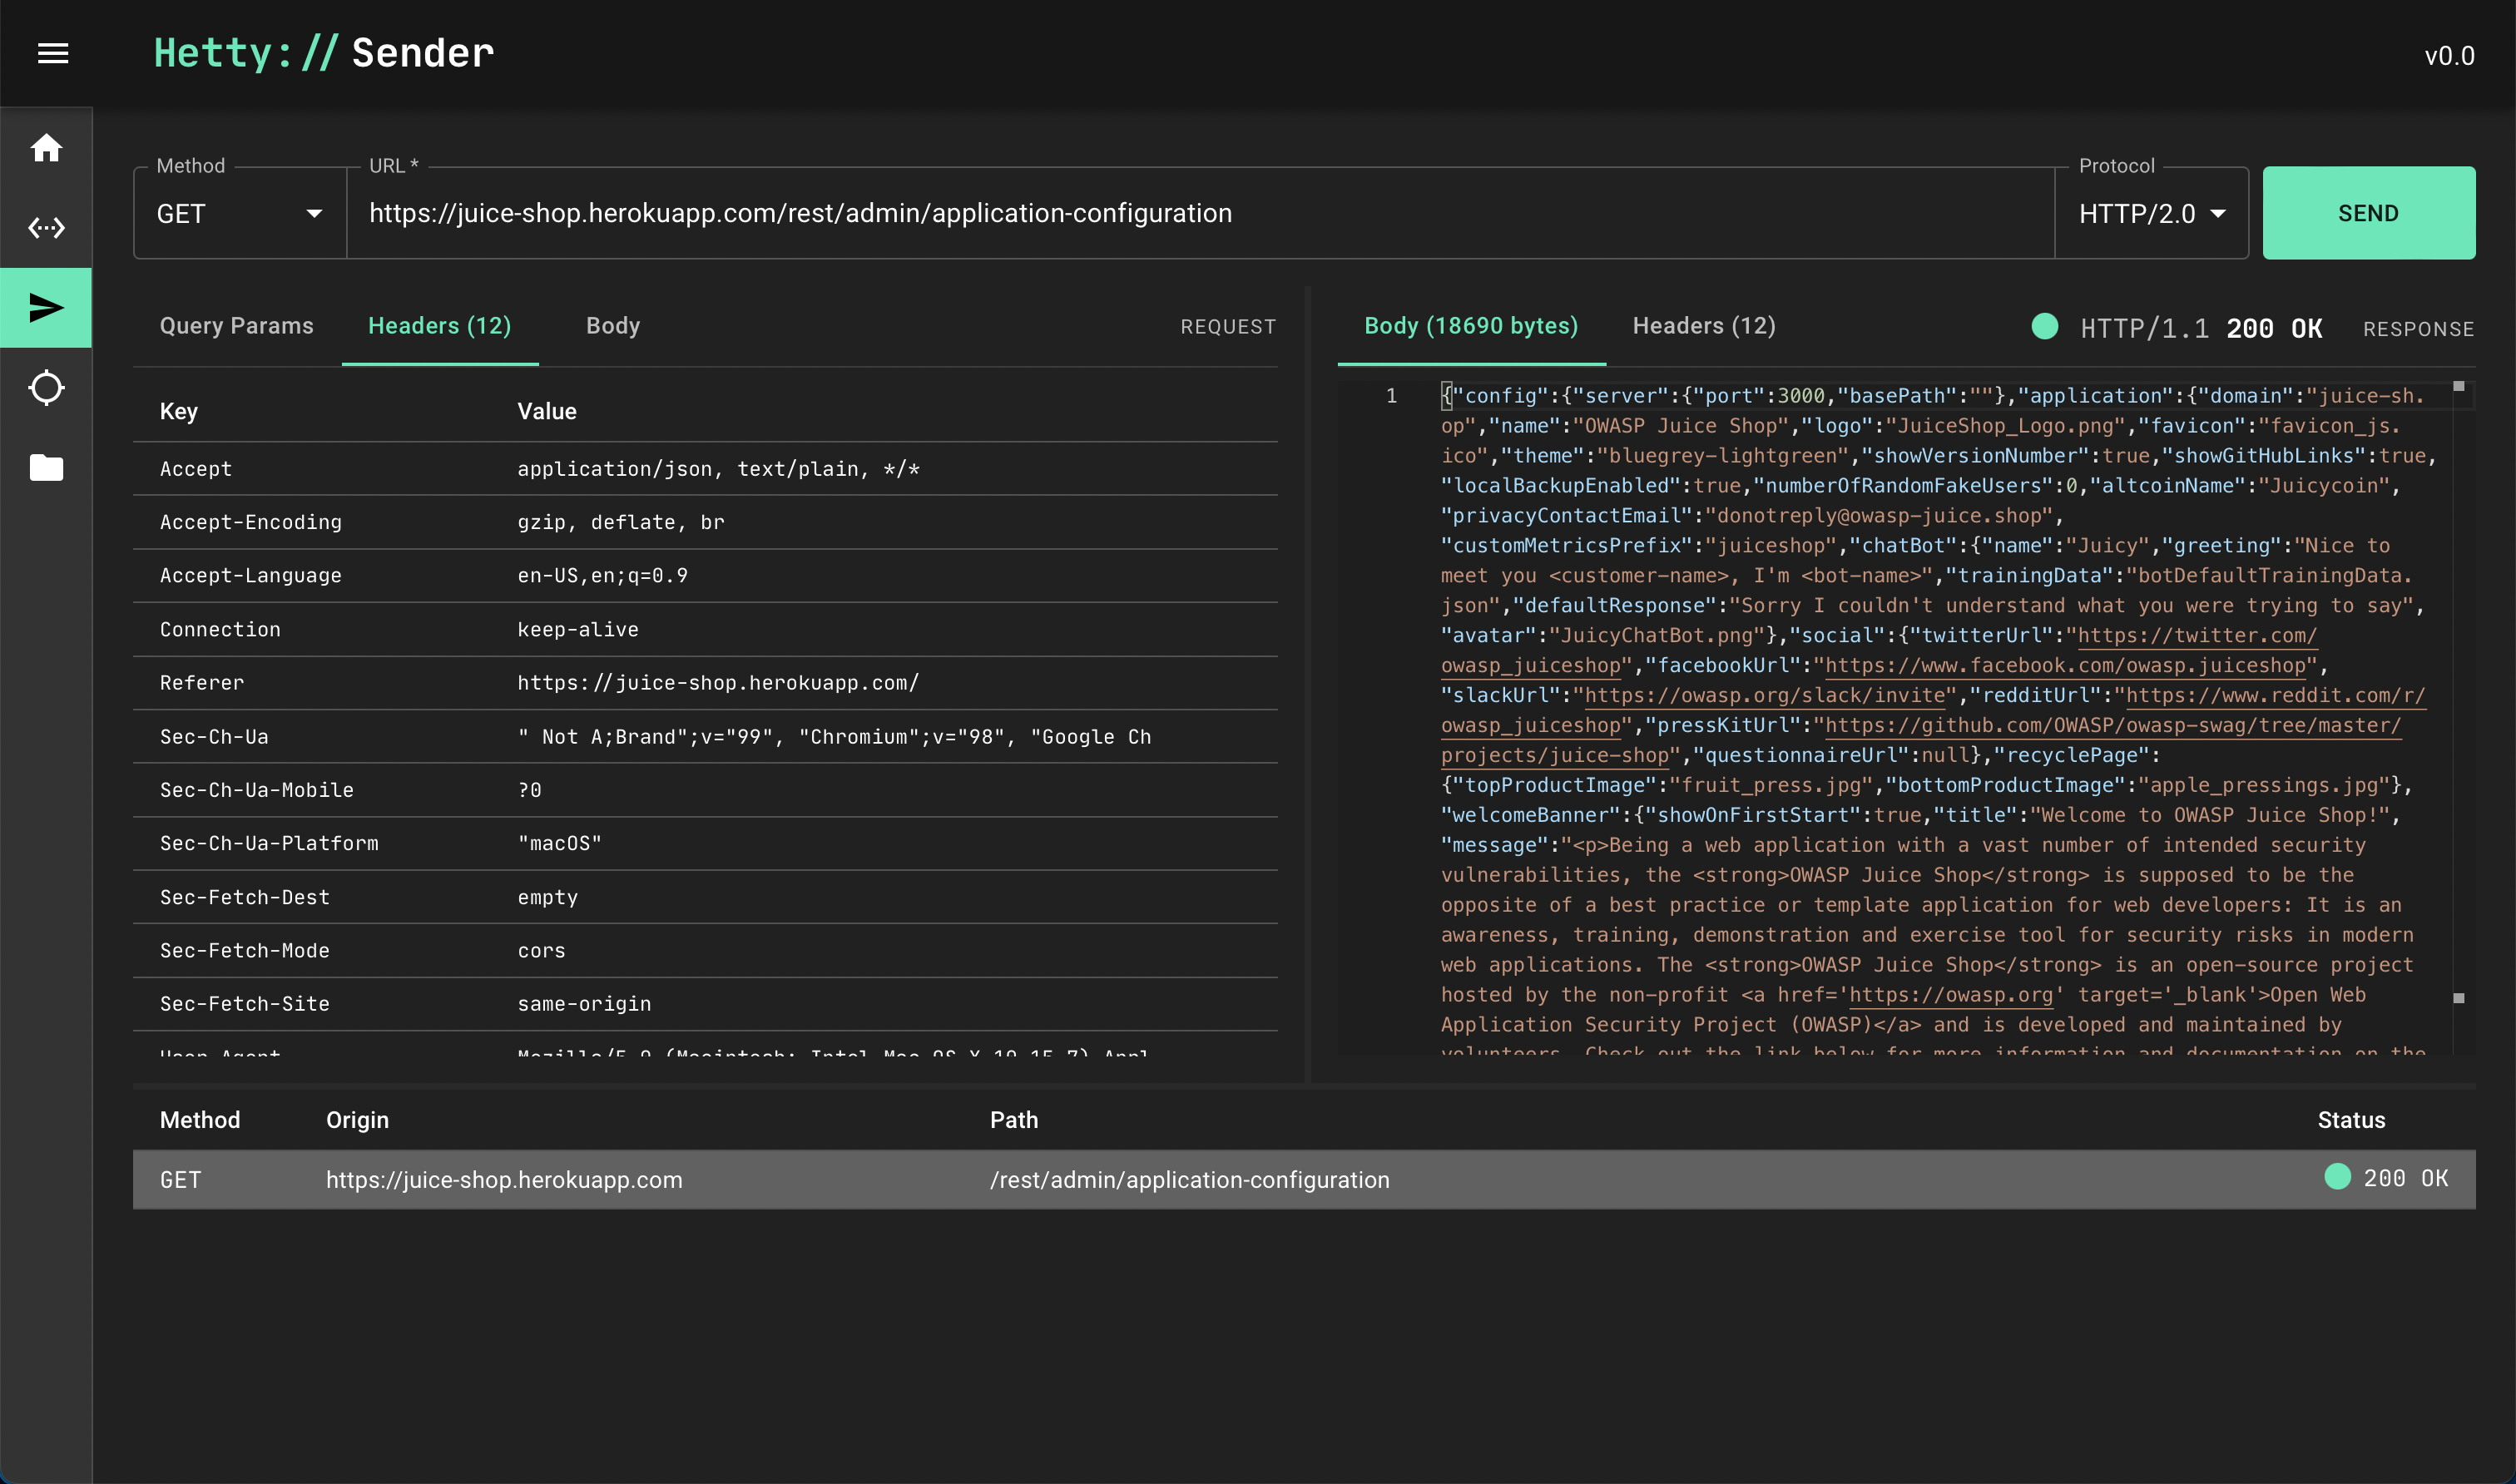
At the bottom of the screen, click the request we just copied from the Proxy logs.
Now you can edit the method, URL, request headers and body of the request. Every time you click Send, a new request is sent and recorded in the history pane at the bottom of the screen.
What’s next?
You should now be up and running with Hetty! 🎉 Check out the guides for more detailed feature documentation.